


How to Do a Silk Press at Home in 7 Steps Like a Pro
9 min read


Is going to the hair salon for a silk press too inconvenient or expensive? Here's a step-by-step guide on how to do a good silk press at home.
The beautiful, shiny and glossy result that you get from a silk press is a huge confidence booster, and a guarantee to have all eyes on you at any party. However, having to go to the beauty salon frequently is not only inconvenient, but can also quickly add up to your expenses.
Luckily, you don’t need to book a visit to the beauty salon to get a silk press! In this article, we will explain how to do a good silk press at home easily, so you can enjoy a shiny and glam look for any event or occasion.

Let’s get started:
What is a silk press?
A silk press is a technique used for hair straightening that involves the use of a flat iron and a sectioning comb to straighten curly hair, usually type 4 or type 3 natural hair. It achieves a smooth, silky finish without chemically altering the hair’s natural texture.
Silk pressing is popular among individuals who are looking to achieve a sleek, glossy look for special occasions temporarily, without chemical alterations.
What is the difference between a silk press and a flat iron?
While both are used to achieve hair straightening, a silk press is different from a flat iron because the first one refers to a technique, and the second one refers to a tool. The flat iron is the main tool used for the silk press, but if used on its own, the result is different and not as glossy.
In our previous article, we detailed the main differences between a silk press vs flat iron - so, make sure to check it out!
How to do a silk press at home in 5 simple steps
Now, on to our step-by-step tutorial on how to do a good silk press at home for beginners, let’s take a look at everything you need to get started:
1. Prepare the tools & products you need: a checklist
Before you start your silk press routine, the first step is to ensure that you have all the tools and products you need to achieve the stunning and shiny result you get from a beauty salon. We have prepared a checklist to get you going:
Best tools for silk press at home:
- Flat iron
- Sectioning comb
- Blow dryer
- Round brush
Best products for silk press at home:
- Hydrating shampoo and conditioner
- Thermal heat protectant
- Finishing hair spray
While the silk press is a great technique for achieving a straight, bouncy and shiny hairstyle that lasts for weeks, it can be damaging if you are using a low-quality flat iron made from cheap materials.

The award-winning NuMe Megastar Flat Iron is a great option if you are looking for a high-quality tool that allows for quick styling minus all the hair damage.
Made with tourmaline plates and proprietary far infrared light technology, it allows wavelengths of far infrared heat to penetrate deeper into the hair shaft, aiding in moisture retention and effortless styling.
2. Wash and condition your hair
Have all your tools and products? Great! The next step on how to do a silk press at home is to wash your hair thoroughly, and make sure that it’s deeply conditioned.
The silk press technique exposes the hair to high temperatures - up to 450°F, which means that it can cause severe damage if you are trying to straighten dirty hair as you will be “baking in” all build-up and product residue.
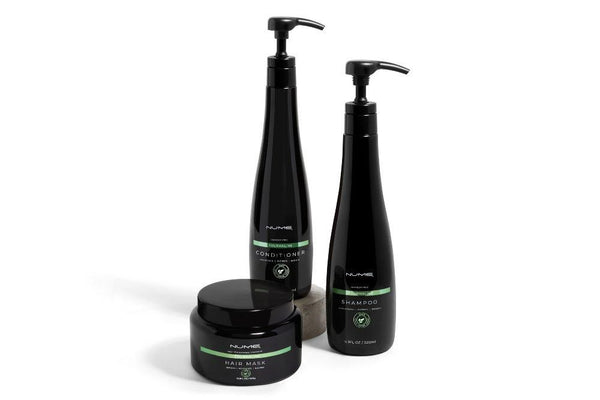
The NuMe Vegan Tourmaline hair care set is the perfect combo of shampoo, conditioner, and hair mask to ensure that you are providing a hydrating and nourishing start to your silk press.
3. Detangle your hair
The next step in our tutorial on how to do a silk press at home is detangling. It’s essential if you are looking to achieve better results and protect your hair from damage, because it minimizes the stress and tension that occur when combing through tangled hair.
Removing knots and tangles also ensures that your hair has an even texture to work with, and the heat from the flat iron is distributed evenly throughout your hair strands.
This reduces the changes of heat damage, as well as the time and effort required to achieve the finished result. So, don’t skip on it!
4. Apply a thermal heat protectant
If you want to learn how to do a silk press at home properly and without damage, don’t forget that you will be dealing with exposure to high temperatures, up to 450°F.
Applying heat without protection can damage the hair in multiple ways, including:
- Dehydration, caused by the evaporation of the water molecules in the hair
- Protein breakdown, leading to weakened hair with split ends and less elasticity
- Cuticle damage, aka damage to the outer layer of the hair, making it frizzy
- Structural damage, such as the loss of the natural curl pattern and texture;
For this reason, it’s essential to use a thermal heat protectant such as the NuMe Watch Me Werk to ensure that you are reducing the risk for damage. Heat protectants create a protective barrier between the flat iron and the heat, preventing breakage and eliminating frizz.
To apply the thermal heat protectant correctly, simply spray a generous amount 3 to 6 inches away from damp or dry hair, and then continue with the next step - blow drying.
5. Blow dry your hair
Blow drying is an essential step for achieving a glossy and shiny silk press at home. Remember to use the right tools, such as a high-quality blow dryer and a round brush, and to avoid using high heat settings to minimize the risk of heat damage.
Start by dividing your hair into small sections using clips or hair ties. Working your way from the bottom sections, use a round brush to lift the hair and direct the airflow of the dryer down the hair shaft.
Work your way up to the head, section by section, until all the hair is dry. This step of our tutorial on how to do a silk press at home prepares the hair for straightening, stretching it and reducing the number of passes required by the flat iron at the later stage.

And we do want to stress on the importance of ensuring that your hair is fully dry. Ironing wet hair is one of the worst things you can do when you are doing any sort of heat styling, as it can severely damage the hair.
6. Use a flat iron to do the silk press
In a similar way to how you prepared your hair with blow drying, repeat for the flat ironing process as well. This time, divide your hair into two sections, and then split the bottom section in two, securing one side with a hair clip.
Next, begin taking hair strands about an inch in size each, to ensure that the heat from your flat iron will be evenly distributed, and the process will be faster. In the meantime, clip the rest of the hair out of the way as you work on each strand.
Perform the silk press technique on each hair strand using a flat iron and a sectioning comb. For each section of the hair, use the sectioning comb to comb through as you are slowly moving the flat iron down the length of the hair.
Do the same for each hair strand until the result is straight and silky, and avoid going over the same section twice as this can cause damage to your hair.
7. Finish with a holding spray
If you are looking for longer-lasting results, finish your silk press with a hold hairspray. This will not only allow you to keep the style in place, but will also add some extra shine to your beautiful hairstyle.
How can I preserve my silk press for longer?
Congratulations! Now you know how to do the perfect silk press at home like a pro. However, this doesn’t mean that your job is fully finished - to preserve your silk press and enjoy your shiny hairstyle for longer, you may need to apply some post-care.
Here are some of our most important silk press tips:
- Avoid wetting your hair - to keep your shiny style for longer, avoid getting your hair wet, because this will cause it to reverse to its natural texture. Use a shower cap when showering to protect it, and avoid doing activities that cause too much sweating.
- Use a satin or silk pillowcase - cotton pillowcases can cause unnecessary friction for your hair, leading to frizz and damage. To preserve your silk press for longer and reduce friction, sleep on a satin or silk pillowcase.
- Use a dry shampoo - to keep your hair clean from buildup and debris, and aid in the absorption of excess oil and sweat, use a dry shampoo. This will help you extend the life of your beautiful silk press.
- Avoid heavy products - heavy products like gels and creams can put an unnecessary load on your hair, weighing it down and causing it to lose its sleekness. Instead, opt for lightweight hair care products.
- Use a thermal heat protectant - you can also get your silk press to last longer by touching it up every once in a while with a flat iron. However, make sure that you are using a thermal heat protectant to prevent damage.
- Avoid touching your hair excessively - if you are touching your hair too much, it may lead to lost sleekness and more frizziness. Try to avoid touching it, and don’t brush it or comb it excessively.
How long does a silk press take?
Exactly how long a silk press takes will depend on the length, thickness, and the texture of your hair, as well as how experienced you are with the process. Generally, it can take anywhere from 1 to 3 hours to complete, and it can last you for up to 3 weeks.
Conclusion
Now that you know the steps on how to do a silk press at home like a pro, you can enjoy the benefits of acquiring a new skill while saving money and trips to the beauty salon.
Remember to use high-quality tools and products to avoid damage, and always make sure that your hair is washed, conditioned, and fully dry before you turn on the flat iron. Good luck!


2 comments
This “how to do a silk oress” is simoly perfect. Everything is oh so clear and simple. It answered all the questions I had.
I feel confident I can deal with the process at home by myself and maybe try it on a friend. Definitely getting the kit tomorrow.
Thanks
Good information